
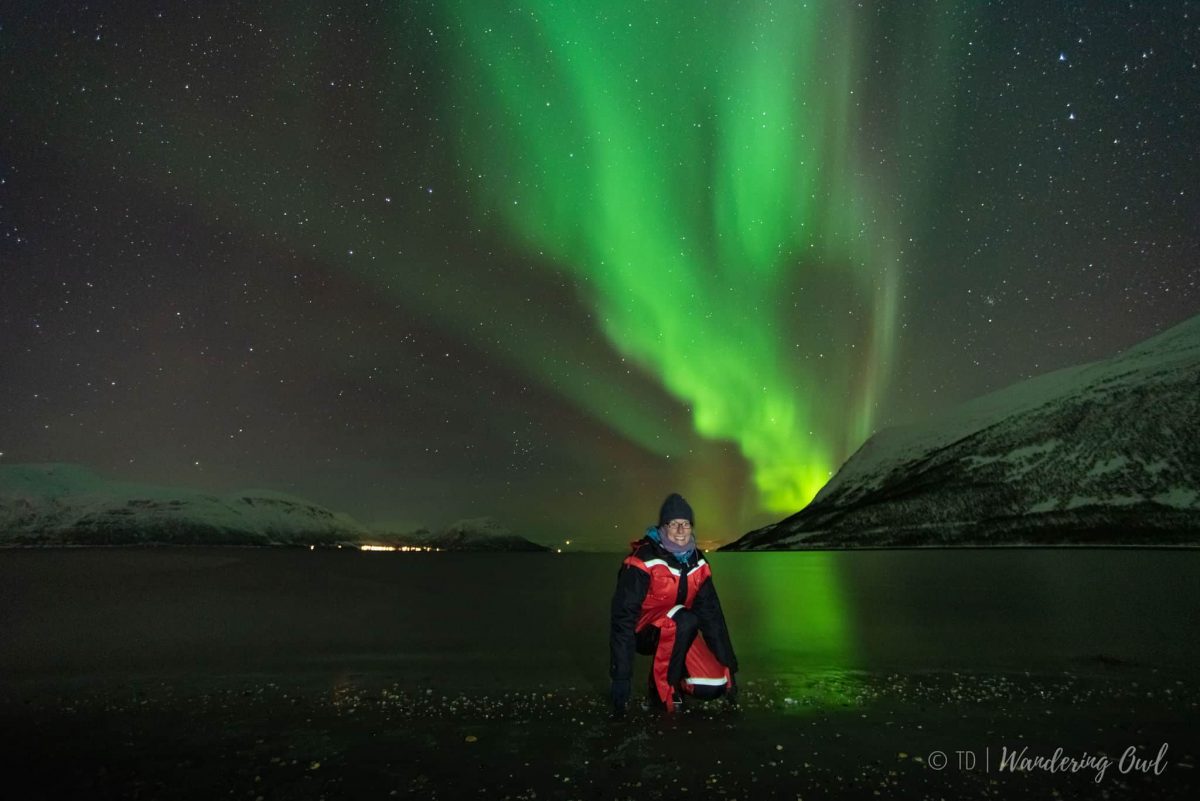
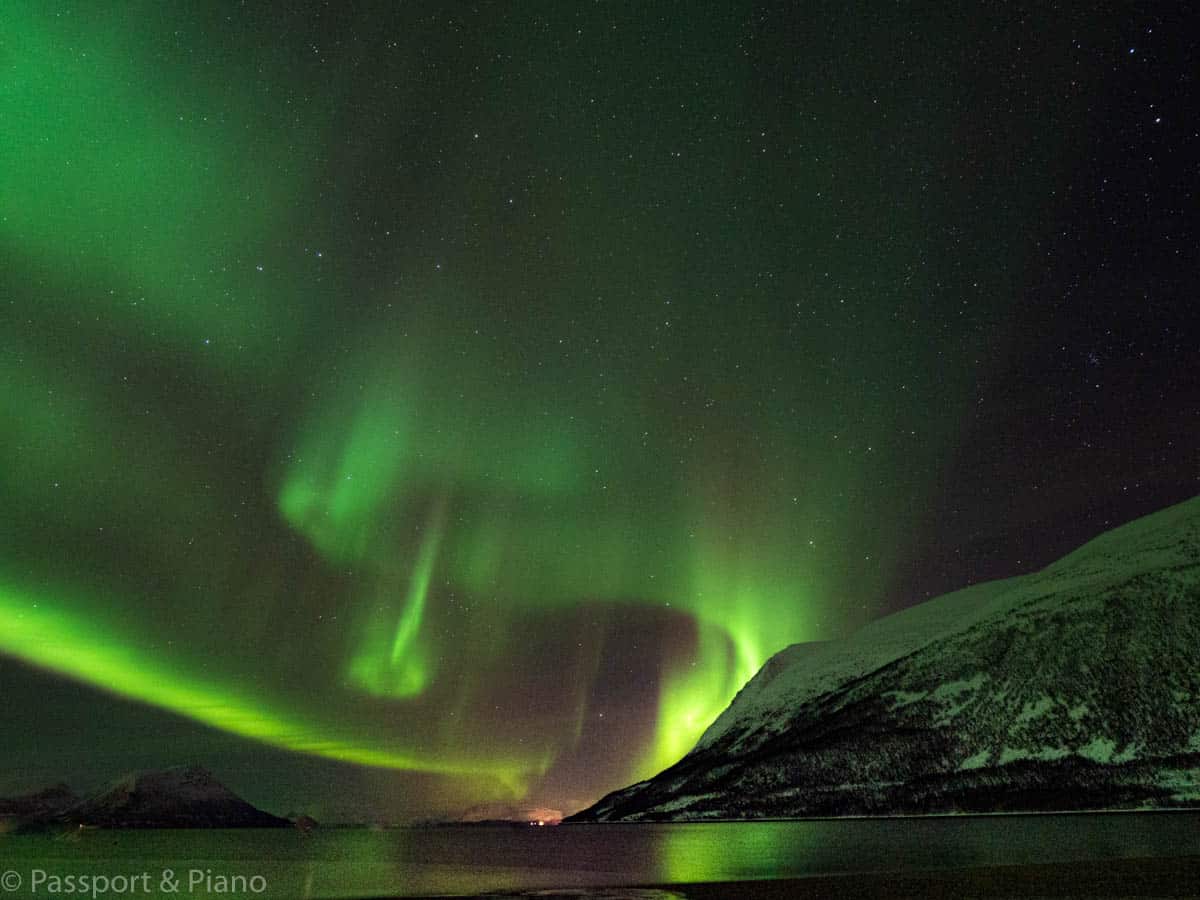
If you’re off to see the Northern Lights this winter, of course, you are going to want to take photographs. However, aurora photography isn’t as easy as taking pictures in daylight.
This article may contain compensated links. Please read my disclaimer policy for more info.
Before my northern lights trip to Tromso, I did lots of research online into aurora borealis photography. Still, I struggled to find a guide that wasn’t too technical.
I’m not a complete novice, but I’m not a professional photographer either.
The photographs throughout this blog are mostly my work, but night time photography is a different ball game.
It’s almost impossible to get the camera to focus in the dark; you need to think about shutter speed, delayed timer, and so the list goes on.
Having now gained experience of night photography, I’ve written this beginners guide which is user-friendly and explains all the terminology you need to know.
What Camera Equipment do you need for Aurora Photography?
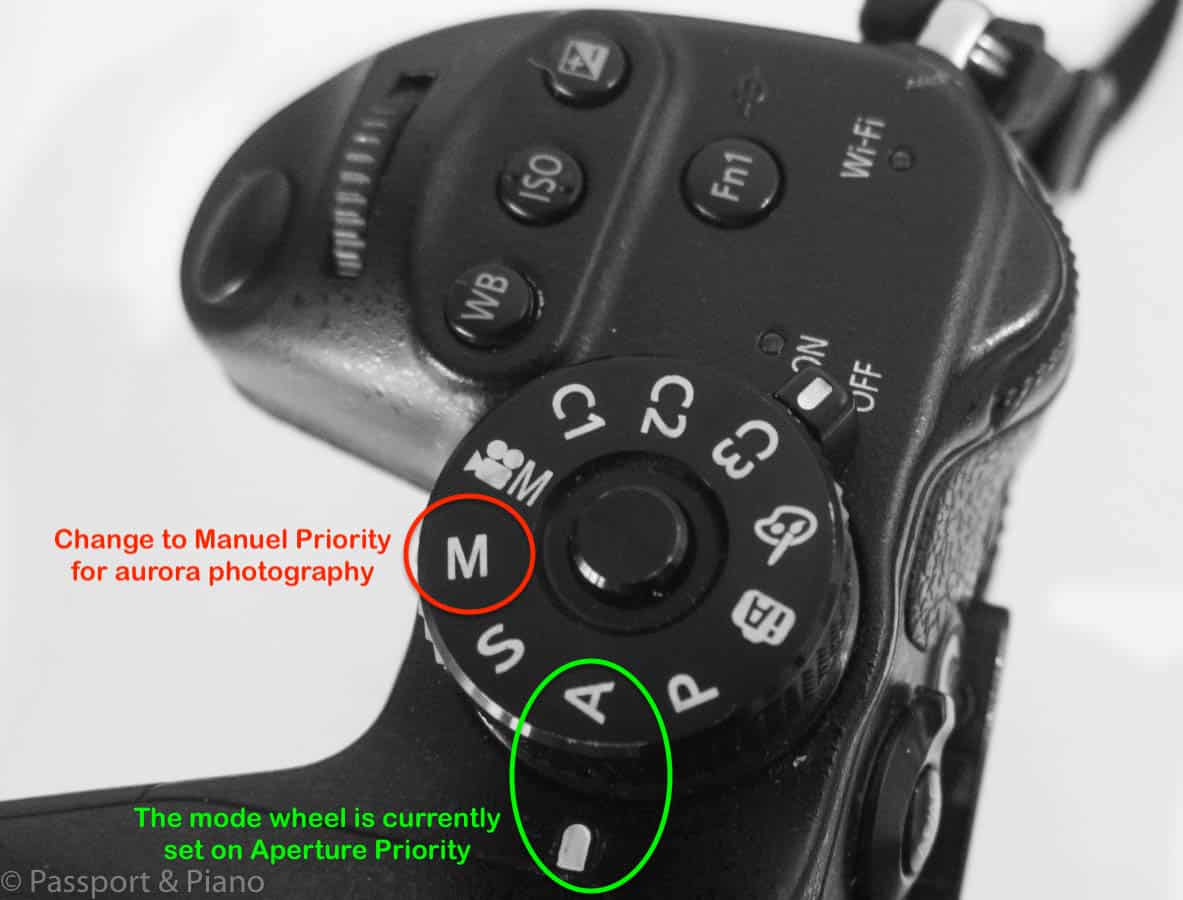
To get great pictures of the northern lights, you need to have a camera that has a Manuel mode.
Whats Manuel Mode?
Many cameras allow you to take pictures using different modes; common ones include automatic, aperture and speed. With these modes, you can control part of the camera’s settings and the camera will sort the rest.
Manual mode, however, allows you to manage all the settings.
How do you find Manuel Mode?
There’s usually a dial on the camera that has letters on it which you can turn to change the settings.
Once your camera is Manuel mode, you will need to set the focus, aperture. Iso, shutter speed and white balance to take pictures of the aurora lights.
Don’t worry; this guide will explain all these settings.
What is the Best Lens for Northern lights Photography?
Lenses are expensive, but they’re worth the investment.
For northern lights photography, a wide-angle lens works best. You can spend crazy amounts of money, but it’s not necessary.
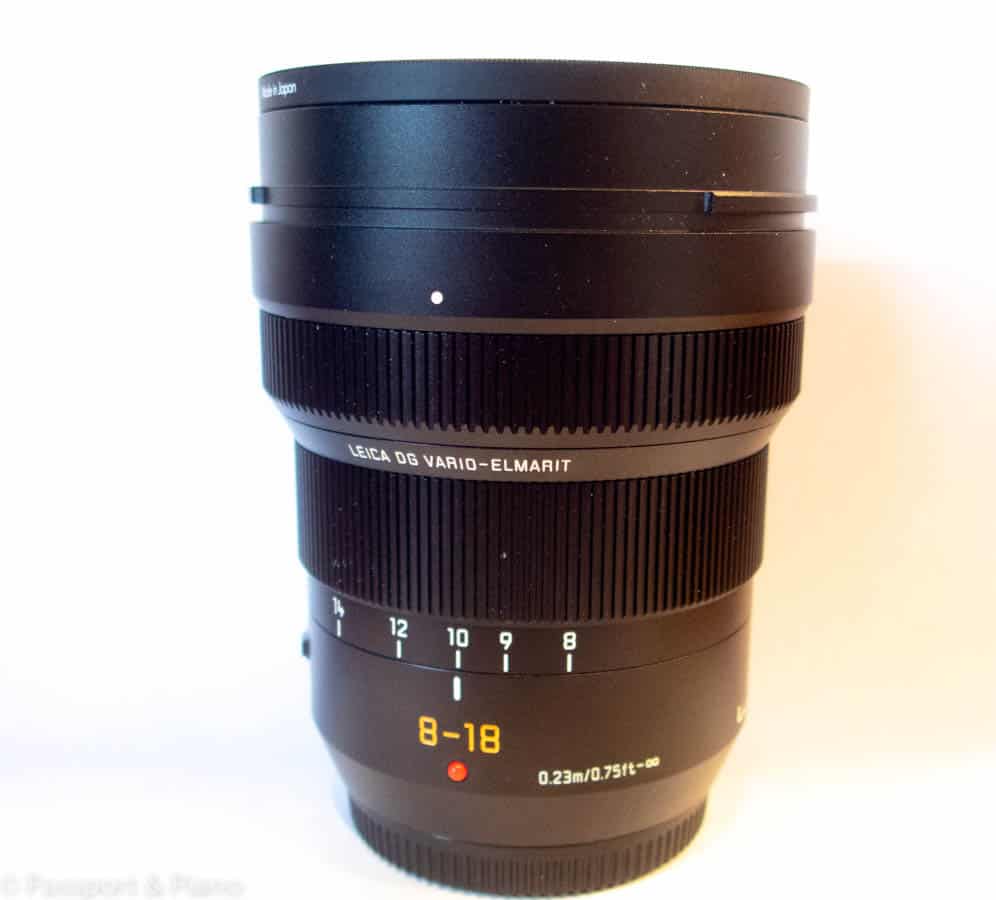
Ideally for taking photos of northern lights, you want the lens to have an f stop of 2.8 or less, but anything up to f. 4 can work.
The f stop number relates to the aperture opening and the amount of light that the lens allows into the camera.
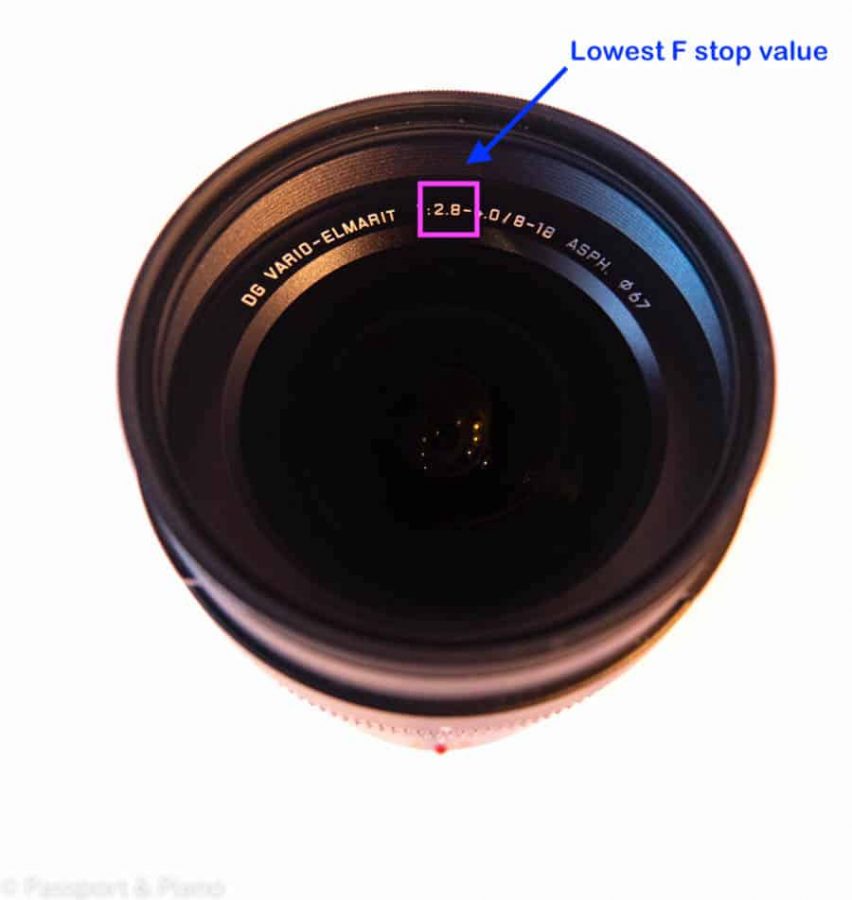
How do you know what the minimum F stop value of a lens?
On my [easyazon_link identifier=”B071QWM469″ locale=”US” tag=”passportand0e-20″ cart=”n”]Panasonic Lumix wide angle lens[/easyazon_link], the number is written on the inside of the glass.
Canon lenses usually print the number on the focusing ring near the top of the lens, while Nikon print there’s towards the base of the lens.
The best aurora lens will depend on the camera that you have and how much money you are willing to spend.
Get Yourself a Tripod
If you’re going on a northern lights tour check to see whether the company provide tripods, companies that do are usually a little more expensive. However, they’ll probably still be cheaper than investing in a tripod.
If you’re heading to Norway you may find this post on the best Northern Lights tours from Tromso helpful.
If however, you’re hoping to see some aurora activity by yourselves you will need to carry a tripod for northern lights photography.
What is the best tripod for Northern Lights?
Look for a tripod that’s sturdy and lightweight. Weight is an essential consideration as you are going to need to carry it with you for long periods.
For that reason, I opted for a carbon fibre travel tripod which is more expensive than the aluminium ones, but they are lighter.
Manfrotto is one of the most popular makers of tripods, but you can check out some alternatives here.
Why do you need a tripod?
Even if you’ve purchased the best camera for northern lights photography you’re still going to need to use a long exposure time; hence you’ll need a tripod.
Without a tripod, camera shake is likely to happen as it’s not possible to keep completely still for long periods.
Using a tripod will mean that your aurora borealis images will be sharp, clear and in focus.
Purchase a Shutter Release Button or Remote Control
If your camera has a time delay function or a phone app which allows you to operate the camera remotely, a shutter release button isn’t necessary.
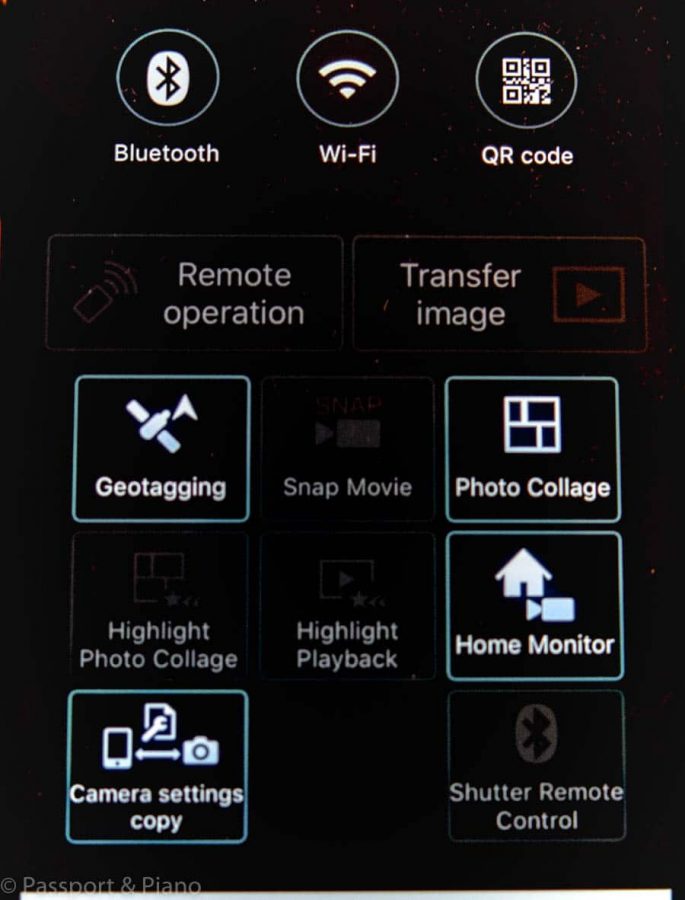
If not, then consider buying a shutter release button that has a timer to eliminate any camera movement when taking pictures.
Get to know your Photography Kit.
Before I go into detail about how to photograph the northern lights, the first thing is to make sure you know your way around your camera.
You can delve into your camera Manuel and have a read. Still, before you do that, I recommend checking Tony Northrup’s Youtube channel to see if he’s done a tutorial of your model.
Tony’s videos are fantastic, and he speaks in a language you can understand. I highly recommend his book [easyazon_link identifier=”0988263408″ locale=”US” tag=”passportand0e-20″ cart=”n”]How to Create Stunning Digital Photography[/easyazon_link] which covers everything you need to know with loads of videos to watch as well.
What are the Best Camera Settings for Northern Lights Photography?
Of course, with experience and practice, you’ll get better at taking pictures of the northern lights, but everyone has to start somewhere.
The following guide is for beginners and people who have not explored their photo equipment in depth before.
Consider changing the file format to Raw
Set your camera to take pictures in Raw and Jpeg format.
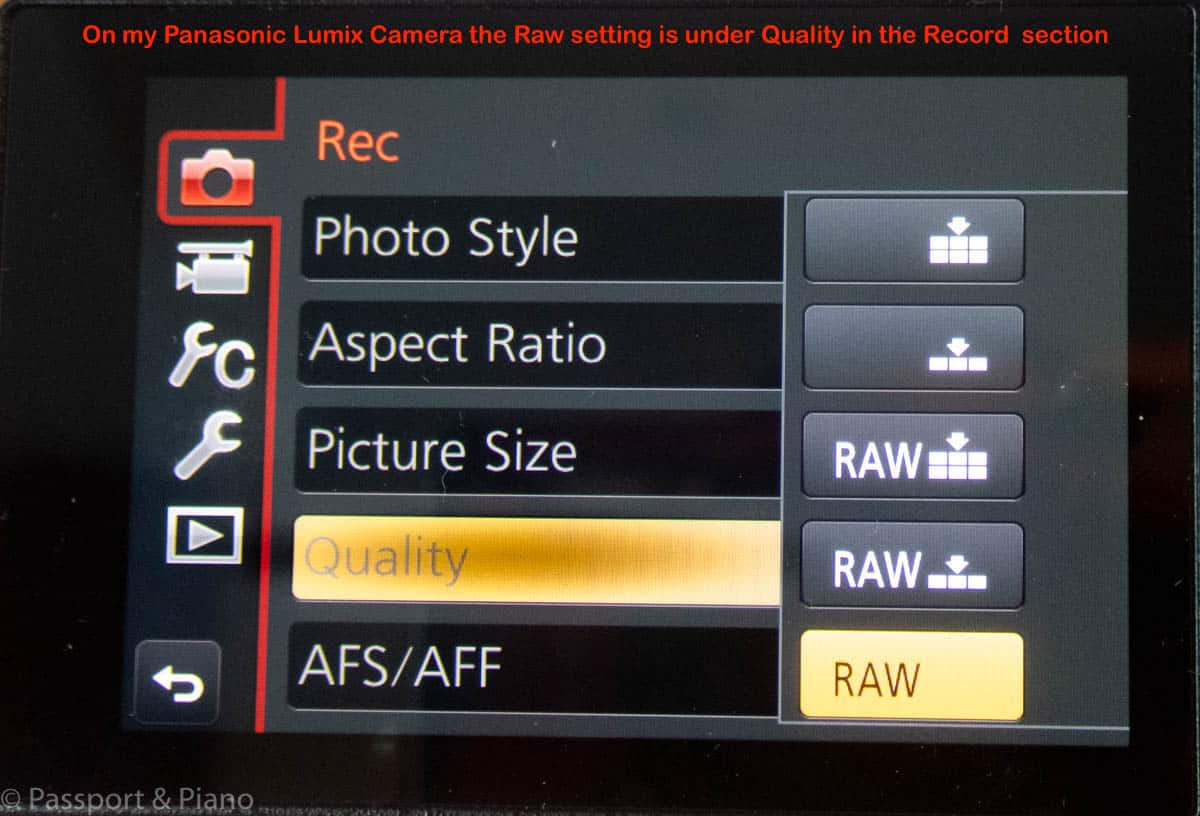
Raw files store all the data that the camera captures, which gives you much more control when it comes to editing.
Brighten or darken the image
Alter the shadows
Adjust the individual hues (colours)
Lesson noise if the photograph is a little grainy
Sharpen the edges
You can do some of these things with jpeg files but not to the same extent.
What’s the downside of Raw files?
The downside of Raw files is their size; you will need a much a [easyazon_link identifier=”B07H9DVLBB” locale=”US” tag=”passportand0e-20″ cart=”n”]bigger SD card[/easyazon_link] if you want to shoot in this format.
It’s also worth getting an [easyazon_link identifier=”B06W55K9N6″ locale=”US” tag=”passportand0e-20″ cart=”n”]external hard drive[/easyazon_link] to save your northern lights photographs to after each trip.
Raw photos need editing with photographic software so that you can export them to JPEG before you can share them.
Editing programs allow you to do so much with your photos but they can be difficult to navigate when you first attempt to use them.
I use Adobe Lightroom, but you can use Apple Photos on Mac or Microsoft Photos. Some cameras also come with photo editing software.
Start with simple editings such as adjusting the exposure or contrast. Editing makes such a huge improvement to your pictures that you’ll soon want to learn more.
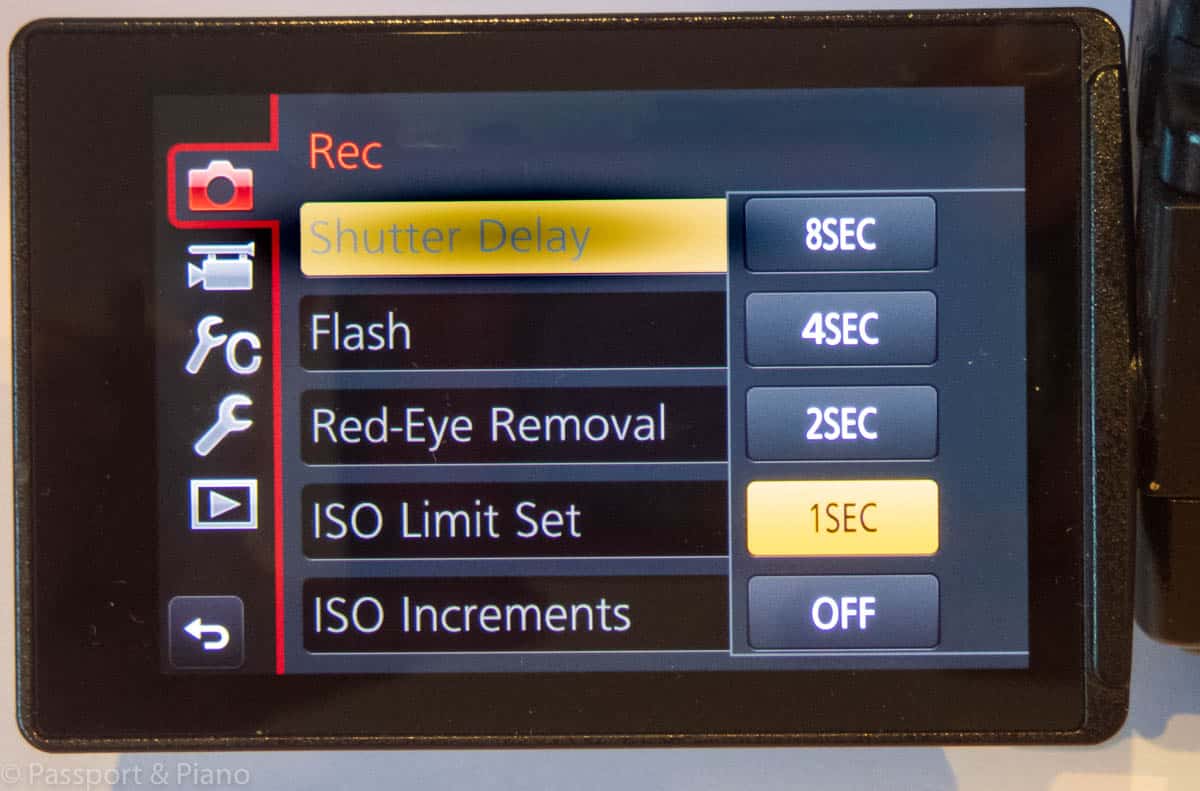
Set the Shutter Delay
If your camera has a shutter delay setting, enable it so that there is at least a 2-second delay before your camera takes aurora photos.
Turn off the Image Stabiliser
If your camera lens has an image stabiliser, you will need to turn this off as it’s not required when taking long exposers using a tripod.
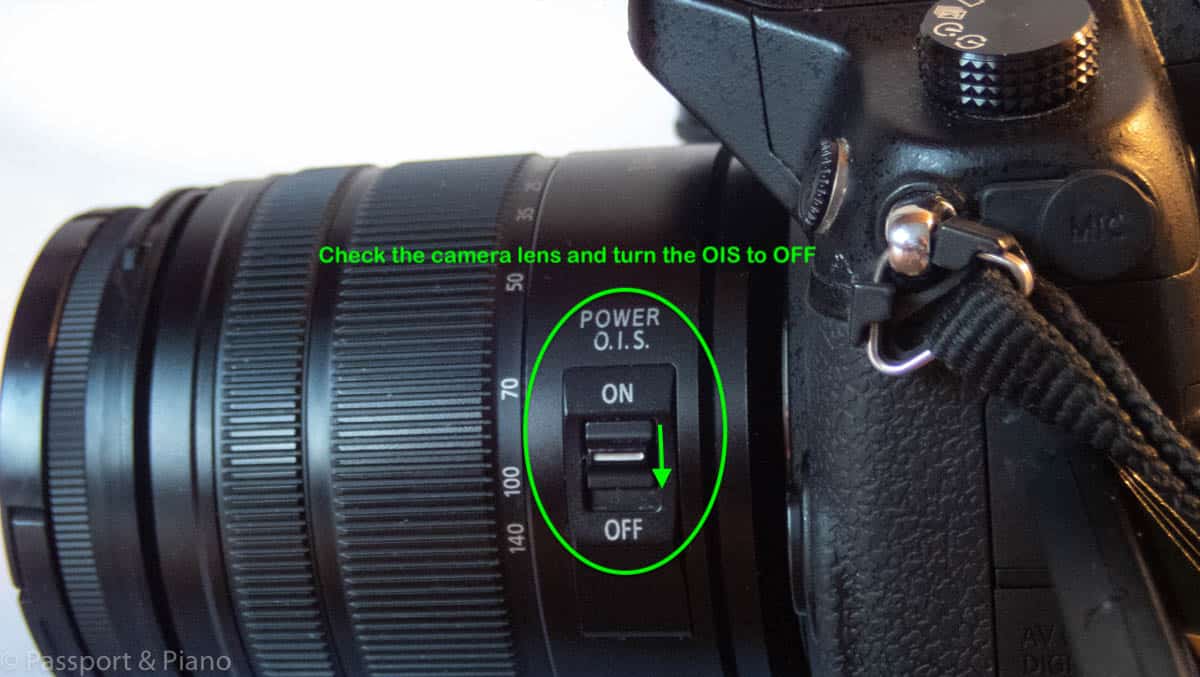
Some cameras may turn it off automatically if it detects a shutter speed of longer than a second.
Consider turning off the Noise Reduction
You may want to disable this feature as it doubles the length of exposure time which means it will take twice as long to take a photo.
Noise reduction eliminates hot pixels and subtracts them from your aurora pics, which you can do in the editing stage. That said, I left the noise reduction on when taking the aurora borealis photos in this article.
Remove UV filters
Many people use UV filters to protect their lenses. Still, the extra layer of glass can cause unwanted aberrations in your aurora borealis pictures.
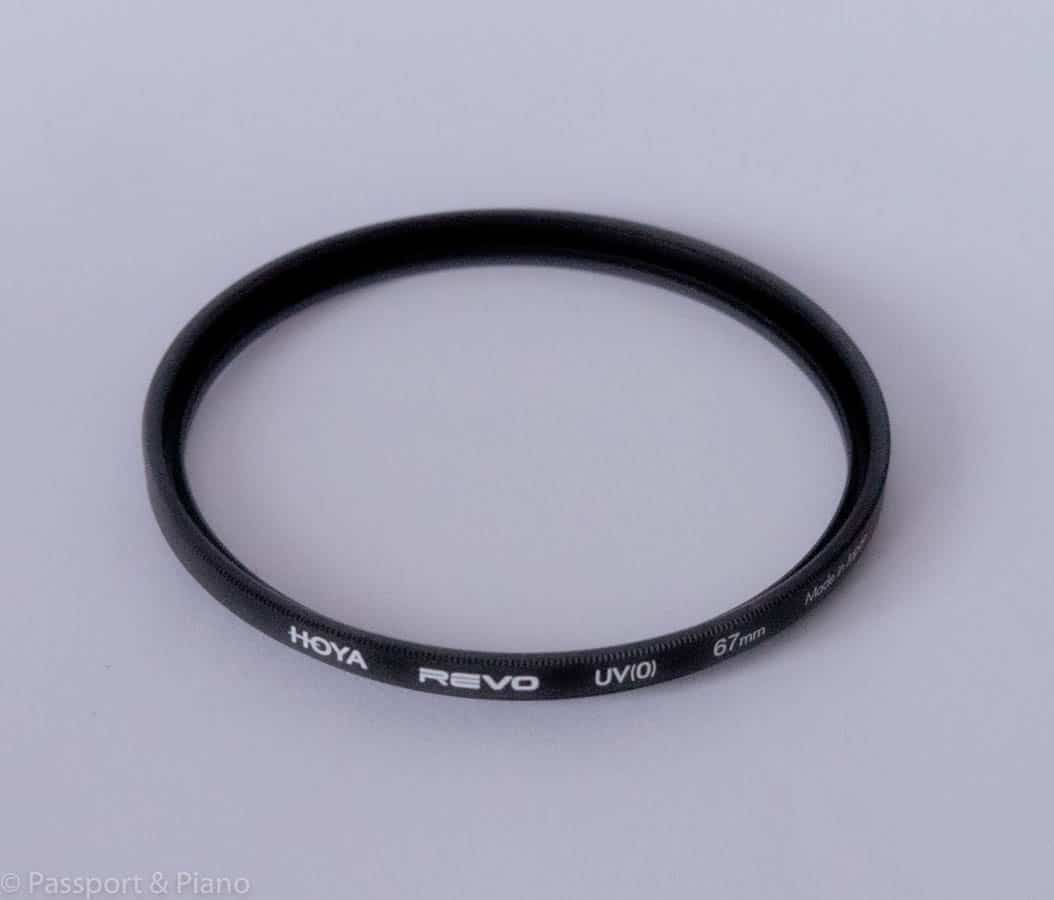
However, it’s not the be-all and end-all if you forget. I did when taking the photos in this article, and the results are still fantastic.
Check the Metering Mode
The metering mode determines the correct exposure for the overall balance of the image. The camera intelligently considers the right balance of shadows, mid-tones and highlights.
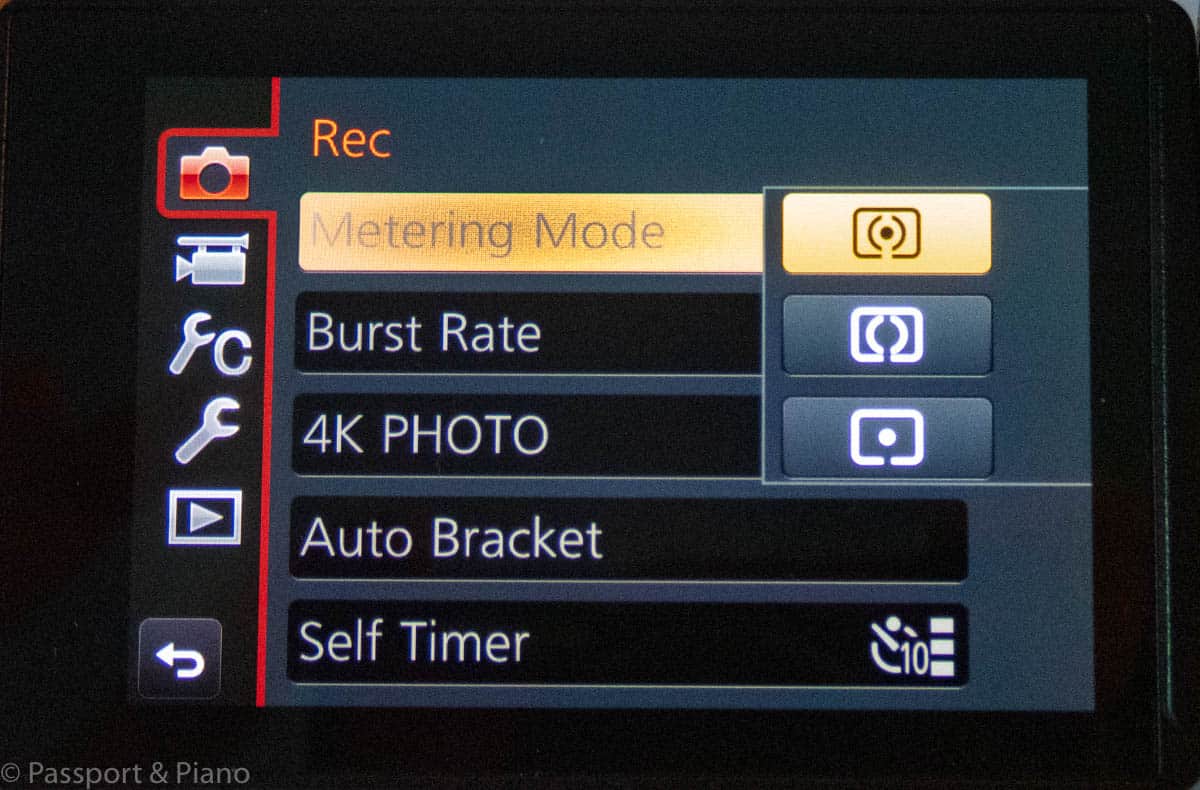
The automatic or default setting is usually Evaluative/Matrix, which takes into account the light across the whole image. For Northern Light pictures, this is an excellent option to choose.
Still, you may wish to experiment with the Centre-weighted setting.
Centre-weighted Setting
Centre-weighted metering still takes light across the whole frame. However, it gives more attention to the centre of the image, regardless of where you set the focal point. Therefore a bright or dark focal point doesn’t affect your overall exposure.
One of the benefits of shooting in raw format is that you can lighten and darken specific areas of a picture when you process them in a program such as Adobe Lightroom.
Change the White Balance if using Jpeg
White balance is of less importance if you are shooting in raw format as you can adjust it later. However, if you’re shooting in JPEG, northern lights pictures look best if you set the white balance to kelvin.
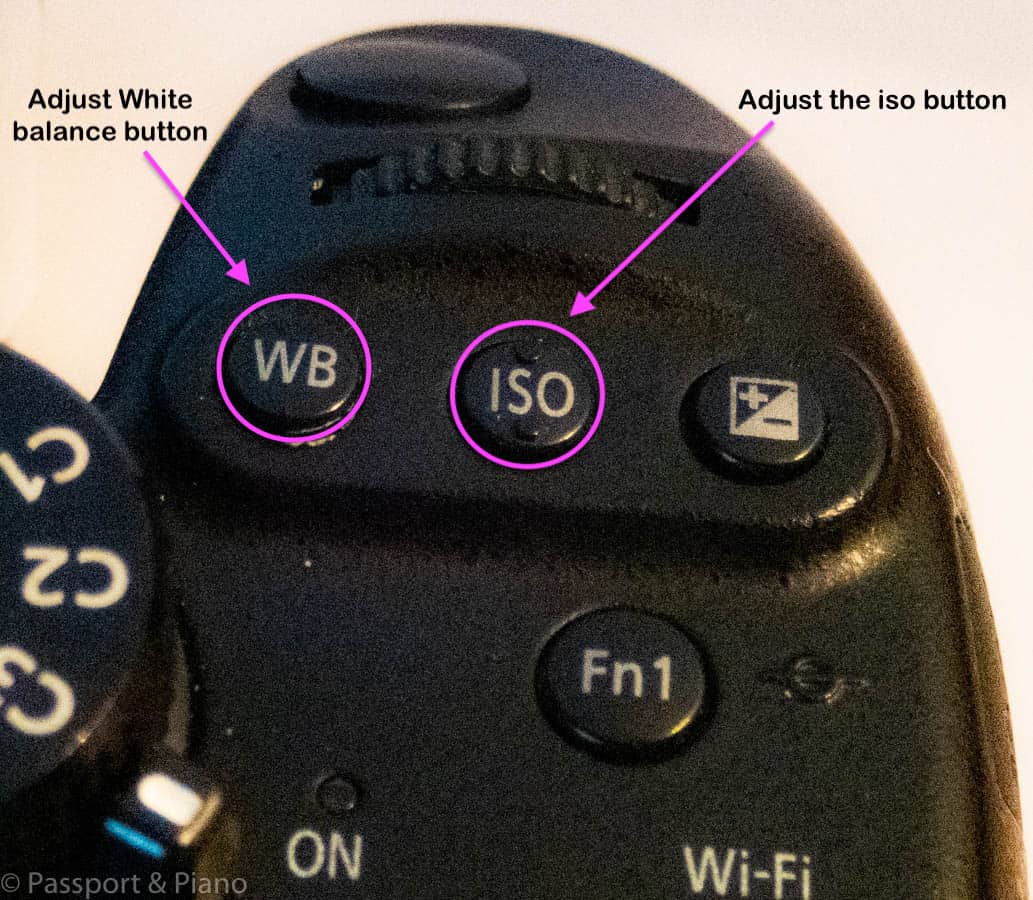

Your camera may have a white balance button, or you may have to go into the menu to alter the setting. A kelvin value between 2800 and 4000 will work best.
How to Select the Aperture
The aperture is an opening that controls the amount of light that can travel through the camera. F stop values are used to measure the opening.
The most confusing thing about these levels is that the higher the number, the less light the camera allows in. Your lens will determine the lowest F stop number, and it’s usually printed on the end of the lens barrel or inside the filter ring on the front of the lens.
For northern lights photography, you want a low F stop value of 2.8 ideally, but you can use numbers up to 4.
The lens that came with your camera is unlikely to go as low as F 2.8. For such low values, you need a wide-angle lens.
What can I use a wide-angle lens for after my aurora trip?
I hear you, these lenses don’t come cheap and you may be thinking if you’ll ever use it again. I’ve found my wide-angle lens to be incredibly useful in cities when I’m sightseeing, particularly when taking pictures of buildings.
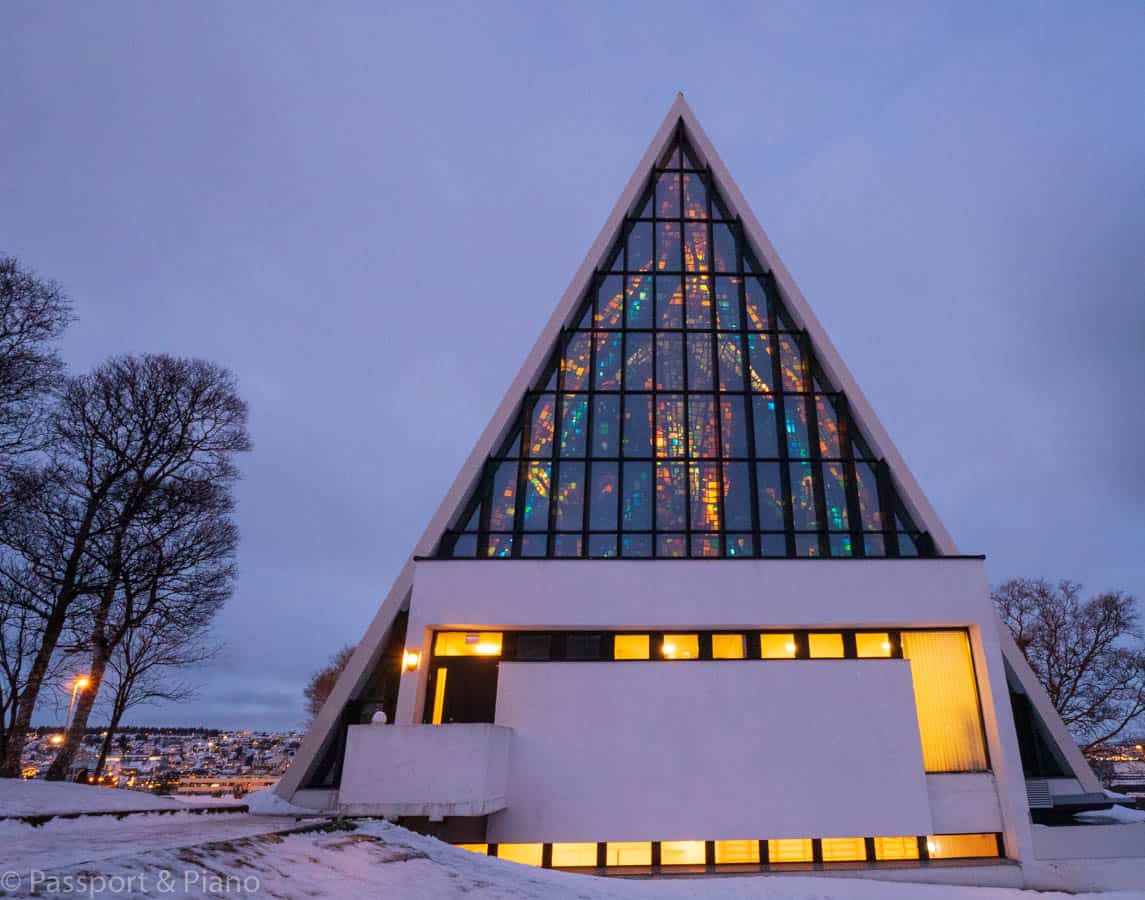
A wide angled lens allows you to be close to a building and still capture all of it, which is excellent in busy city centres or narrow streets.
It’s also a great lens to use at viewpoints when you’re trying to catch a wide field of view.
On my Panasonic GH4, the front wheel sets the f-number when the camera is in manual mode.
You will need to consult your camera manual if necessary to see how to adjust the aperture. However, if the lens is at its lowest zoom, it will also be at its lowest F stop value.
How to set the Focus for Aurora Images
Having put your camera into Manuel mode, the next step is to get your camera focused before going out at night.
Usually, when you take a picture in daylight, your camera uses autofocus. You’ll have noticed that when you press the shutter button halfway before you make a picture a square appears on your viewfinder to show what the camera is focusing on, that’s autofocus.
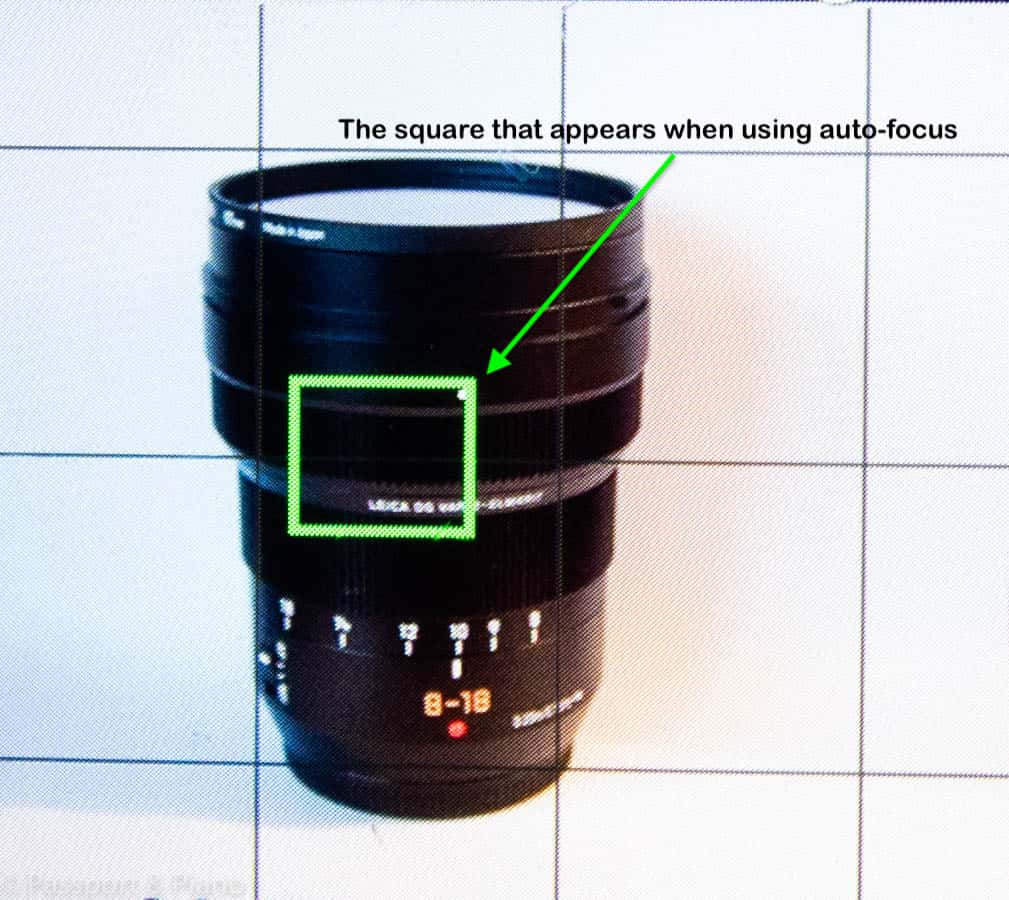
However, when it’s dark, your camera won’t take pictures as it can’t find anything to focus on. When this happens, it can be frustrating.
Before setting off on your aurora borealis photography trip, set the focus of your camera to infinity.
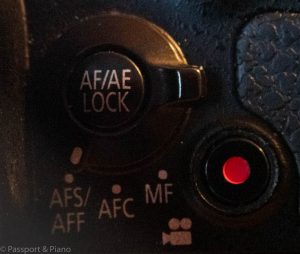
Make sure you turn the autofocus to Manuel focus. On my camera, I have three settings AFS, AFC and MF.
You may need to consult your camera instructions to find the setting on your camera.
How to do you set the focus to infinity?
Here are a few ways of setting the focus to infinity. It depends on your camera and lens, but one of these options should work.
Use the infinity marker on your lens.
Some lenses have an infinity symbol on them which makes it relatively easy to focus to infinity.
Turn the focusing ring all the way to the right or left until you see the infinity symbol on the lens.
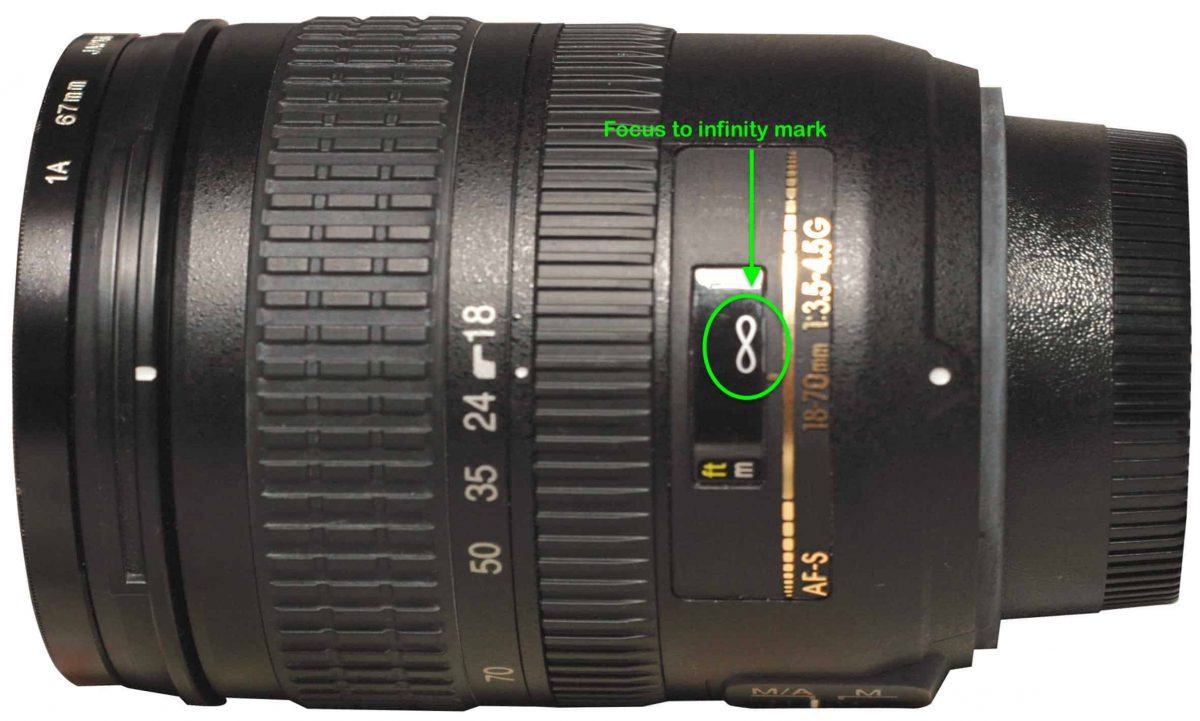
You may find that if you go all the way until the ring stops, the lens doesn’t focus correctly. Often before the hard stop, there’s an L bracket.
If you move the focusing ring back to this position theoretically, it should be focused. Still, you may have to move it slightly.
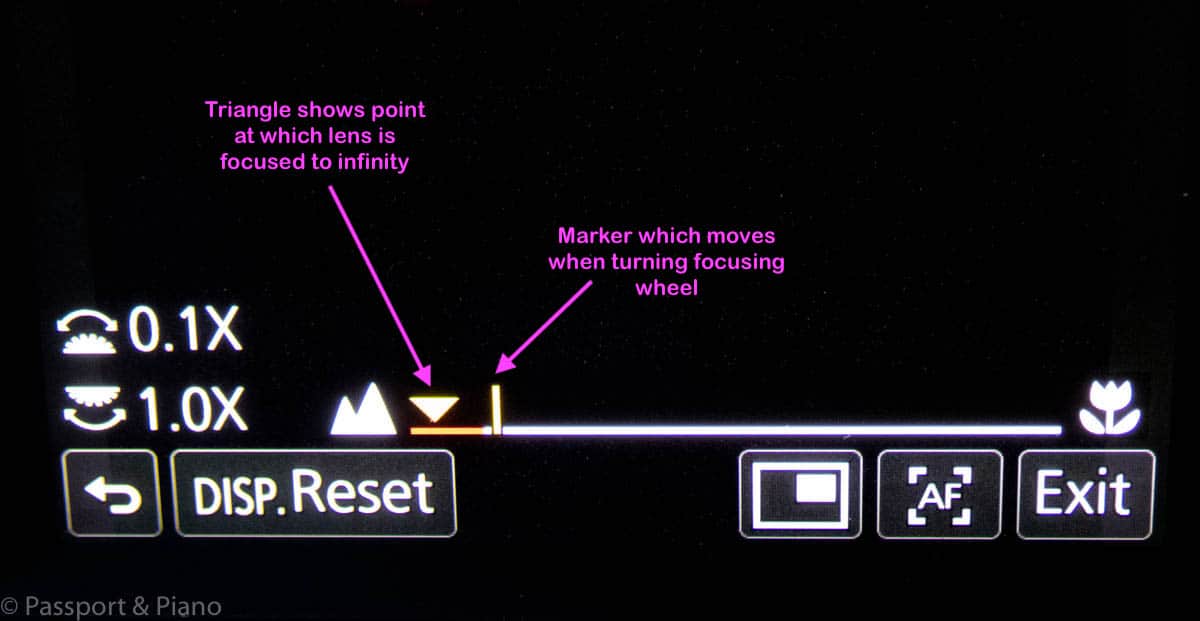
How to set the focus on a lens where the focusing ring turns 360 degrees
My Leica wide-angled lens falls into this category. When I first started learning how to take pictures of northern lights, I couldn’t find the answer to this online.
The lens had an infinity symbol on it, but the focusing wheel has no markings, and it turns 360 degrees, so there isn’t a hard stop.
So here’s how
When you turn your camera on, makes sure it’s in Manuel mode and that the focus is also set to Manuel.
There are two focusing rings on the lens if you turn the one furthest away from you a line appears on the display with a triangle that points to the infinity focus setting.
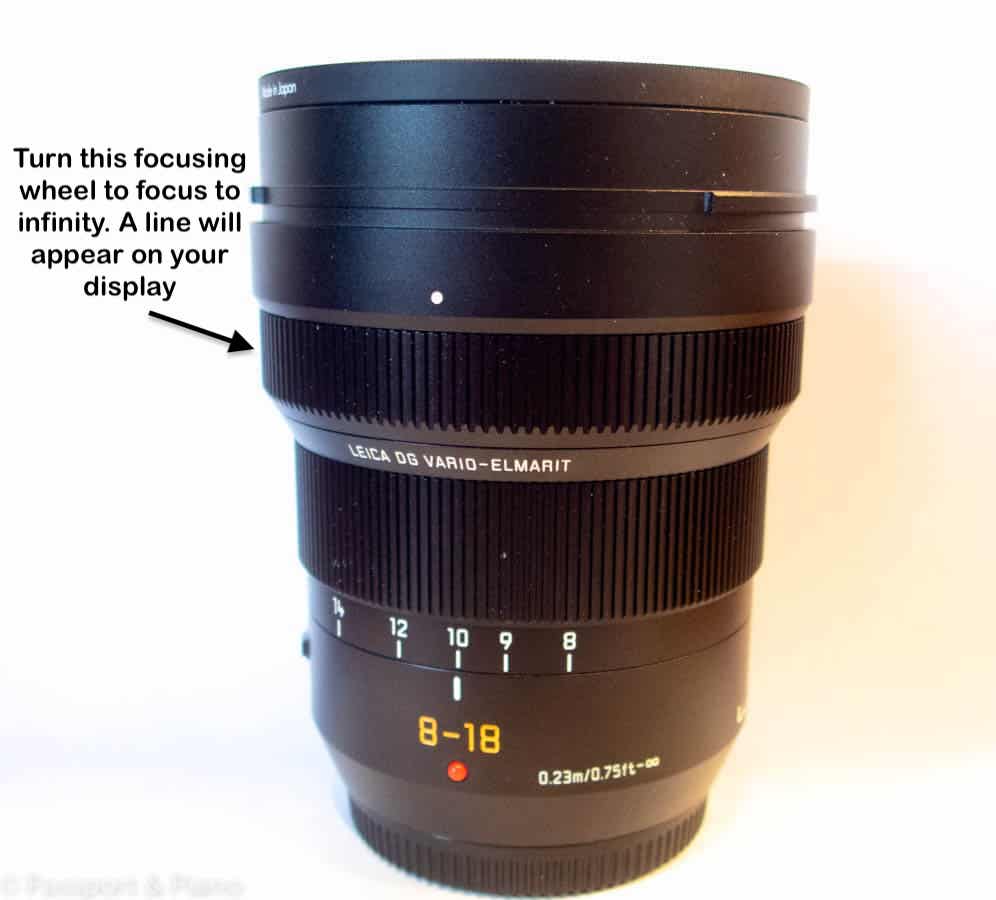
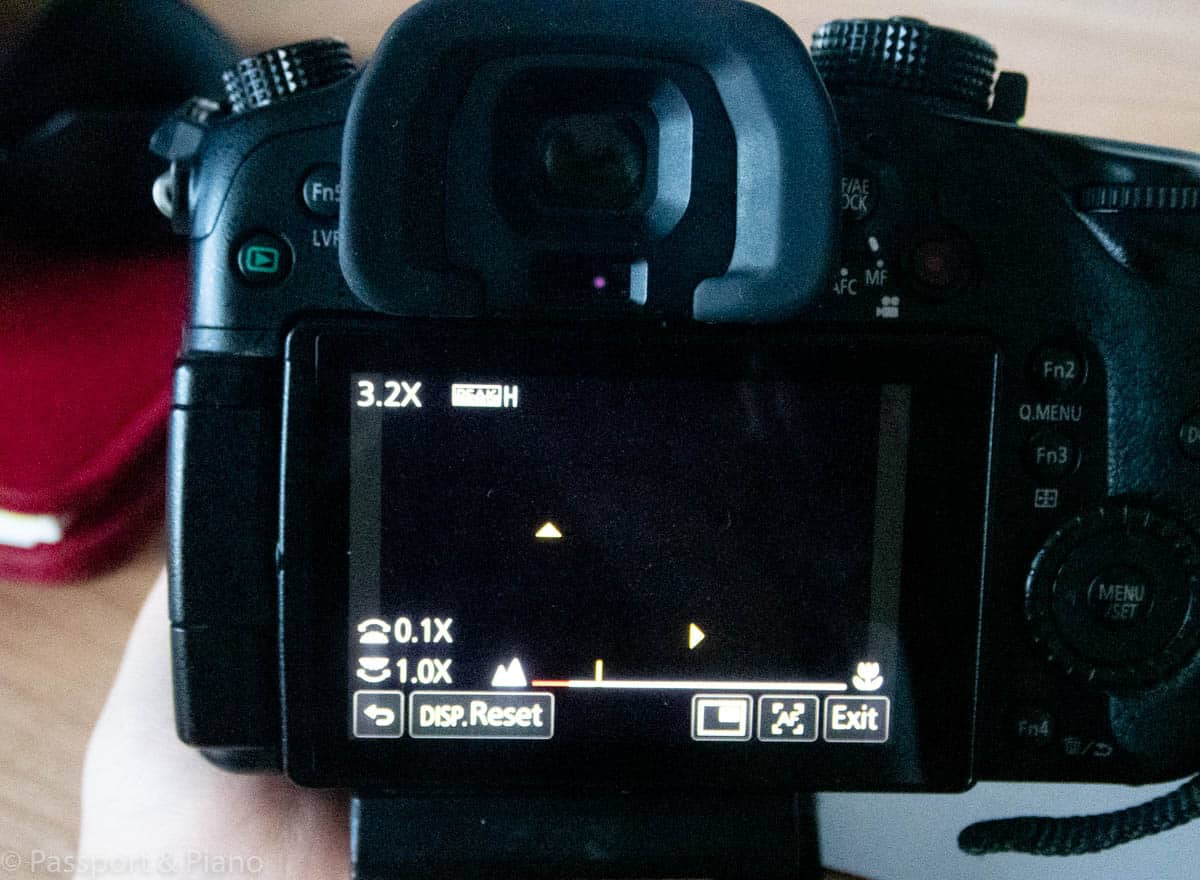
Turn the focusing wheel until the marker on the display lines up with the triangle, and you’re all ready to take your first Aurora borealis photo.
Set the focus during the day
If your lens doesn’t have the infinity symbol on it, you can set the focus during the day.
Using the autofocus of your camera, choose an object that’s in the distance towards the horizon.
Get the subject in focus and then switch to your cameras Manuel focus mode.
Mark the position on the lens barrel and you’ve got your infinity focus all set. If you are worried about the focusing ring moving, before dark, you could use a piece of gaffer tape to secure it while on a tripod, to ensure that it doesn’t move.
If all else fails
Try using your auto-focus to focus on the moon or a bright star once you have it in focus switch to the camera from auto to Manuel focus and use a piece of tape to secure the focusing ring.
It’s more comfortable to use the live view on your camera if you are doing this when it’s dark.
Adjust the ISO
Iso is a way of brightening up your photographs without using a flash in low light conditions. Its one of the settings to make sure you’re familiar with before you go on your trip.
On my mid-range Panasonic GH4 camera, there is a button for iso, which allows me to increase or decrease level.
If your DSLR is an entry-level one, then you may have to go into the menu to find it and then select the level that you want.
If you don’t have a dedicated function button, your camera may allow you to program one so check the Manuel.
Depending on how bright the northern lights are you’ll need to adjust the iso value so make sure you know how to change the amount on your camera.
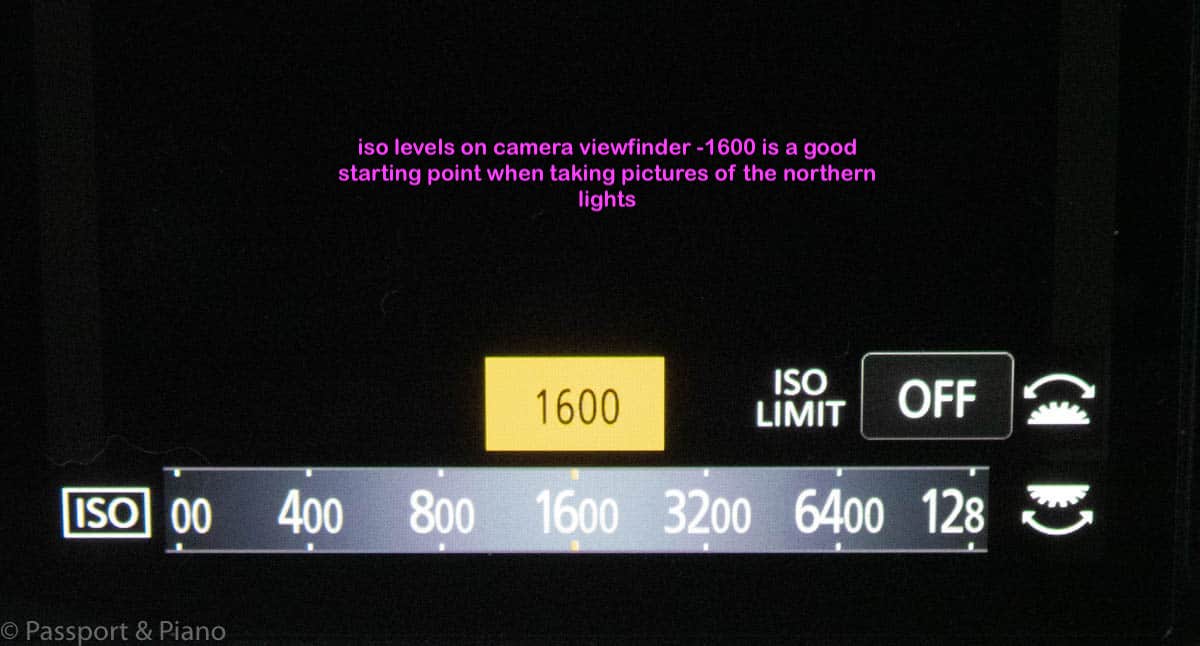
Here are some values that are useful as a guideline.
Very bright Auroras – iso 800
Average brightness – iso 1600 – this is the best setting to start with
Faint auroras – iso 3200
The higher the iso number the more noise you are likely to get in the picture. You can use a longer shutter speed if you want to decrease the iso, but obviously it takes longer for the camera to capture an image.
What Shutter Speed Should you Use?
There are three essential camera settings for aurora borealis. These are the aperture, the iso value and the shutter speed.
If you set the levels correctly on these three settings, you’ll ensure that your camera has enough light for taking pictures.
The shutter speed determines how long the shutter remains open while taking pictures.
For fast-moving auroras start at around 5 seconds, increasing the shutter speed gradually as required.
When the aurora is moving more slowly, start at a shutter speed of 10 seconds and adjust progressively up to 25 seconds or more if necessary.
Don’t be afraid to experiment with the camera settings. You may find that your first photographs turn out all black. If this happens try increasing the iso and the shutter speed. You may need an exposure time higher than the values I’ve mentioned if the aurora is faint.
How to photograph Northern Lights
If you’re not going on an organised northern lights photography tour look for a suitable location during the day.
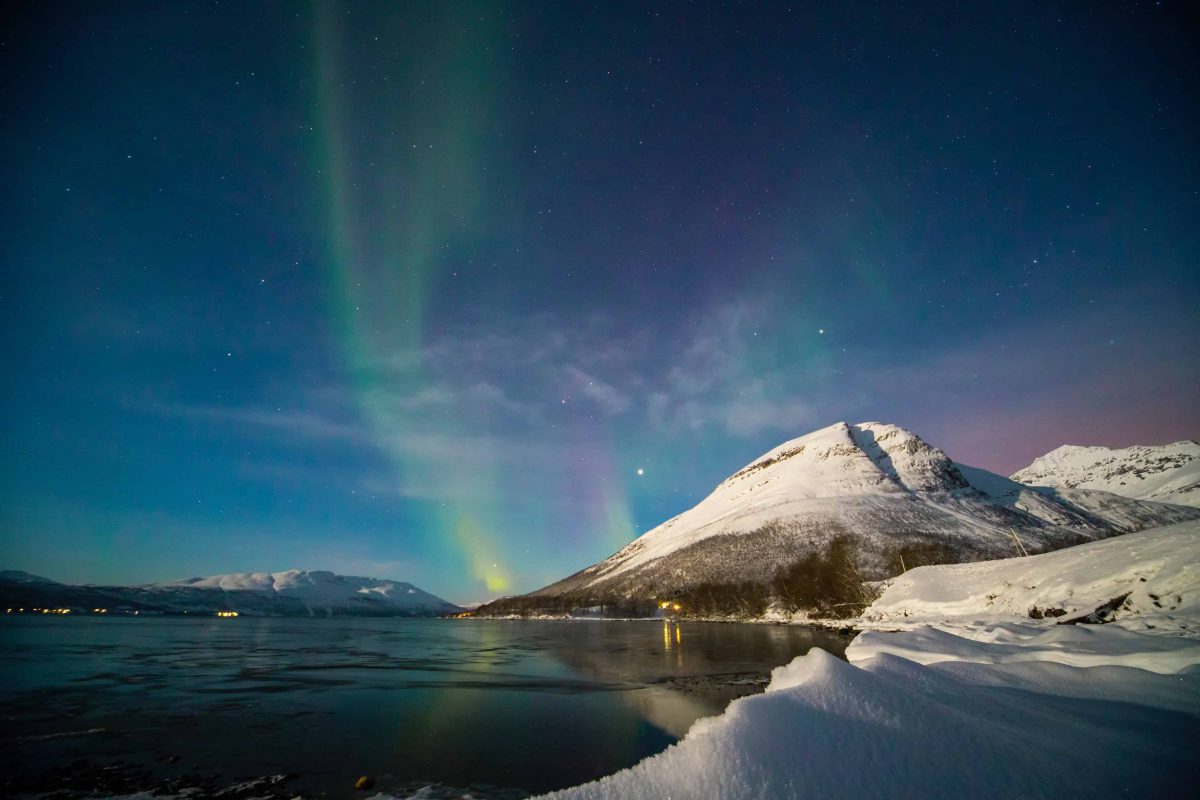
When shooting northern lights photographs, the shots will look better if there is something in the foreground, such as a tree or mountain top.

Apply the same rule of thirds as you would do for landscape photography.
Where can I go to see the Northern Lights
You need to be in a part of the world that is at a latitude of 66° to 60° north and known as the . “aurora zone”.
Visiting destinations that are 2,000-3,000km from the magnetic pole in winter will give you the best chances of seeing the lights.
Northern parts of Norway, Sweden, Finland Canada, Russia and Iceland, make excellent places to visit as does Alaska and Greenland.
To have the best chances of seeing the aurora, you’ll need to get away from the light pollution of the city.
Hence hiring a car is a necessity if you are not going on an organised tour.
When is the best time of year to see the Northern Lights?
The best time to see them is between February-March and September-October. However, it is possible to see them in the aurora zone from late August through to the beginning of April.
Study the weather forecast
To see the northern lights, you’ll need to be in the right location at the right time and have luck on your side. You can check websites such as the weather channel in advance for information on the forecast by the hour, day or month.
Check the Aurora Forecast
To see the northern lights, it has to be dark and the night sky has to be clear with no clouds.
There are some apps, which predict the Aurora forecast, but the accuracy can be a little hit and miss. However, My Aurora Forecast is available for both android and apple phones.
Make sure you know which direction is north facing
If the weather conditions are favourable, the northern lights will usually appear first to the north. [easyazon_link identifier=”B01MY6VVWU” locale=”US” tag=”passportand0e-20″ cart=”n”]Carrying a compass[/easyazon_link] or using an app on your phone is the best way to find which way to stand to be facing north.
What will an aurora look like?
Often the northern lights can be present, but you can’t see them with the naked eye, so when you arrive at your location, take a picture with your camera. Your camera sensors can see much more than your eyes.
A faint aurora looks like a cloud to the naked eye, and it takes practice to be able to decipher the northern lights in the night sky.
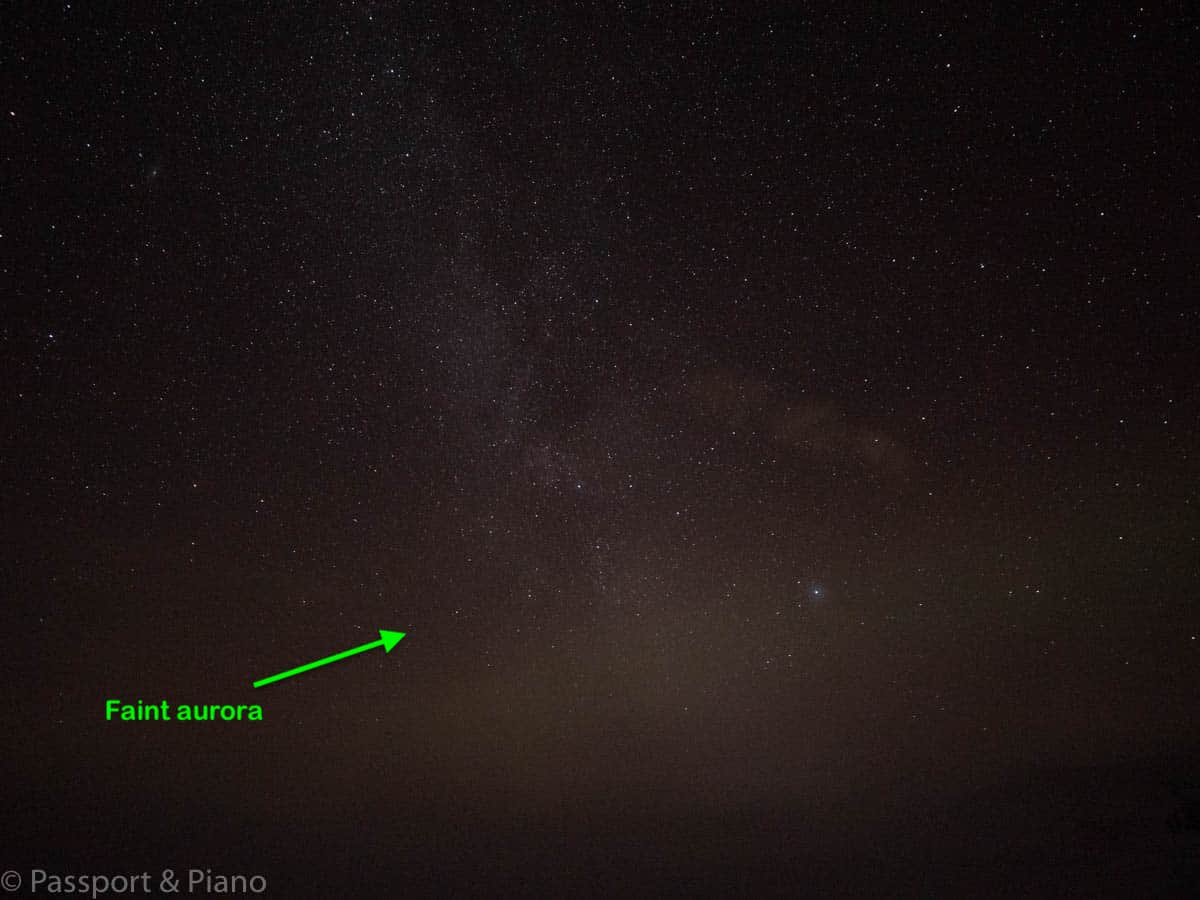
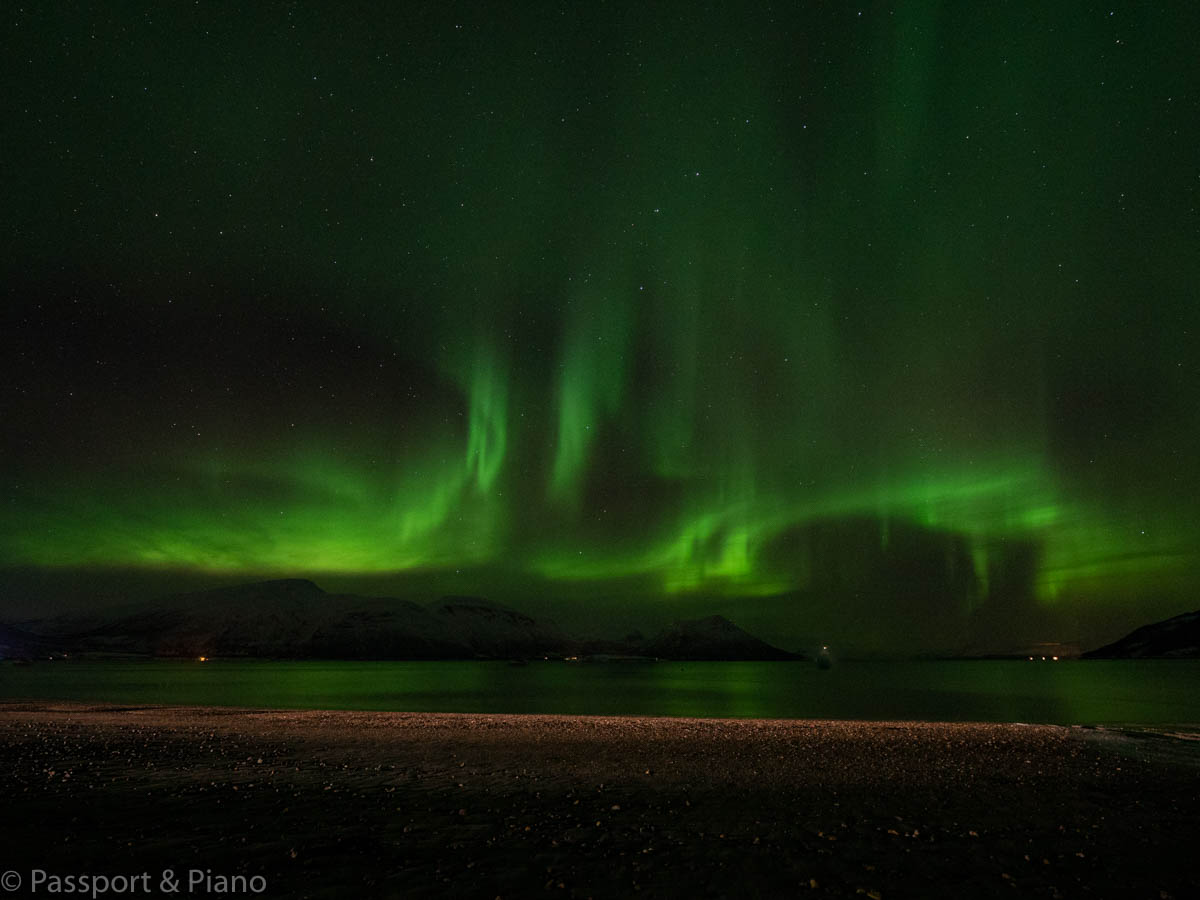
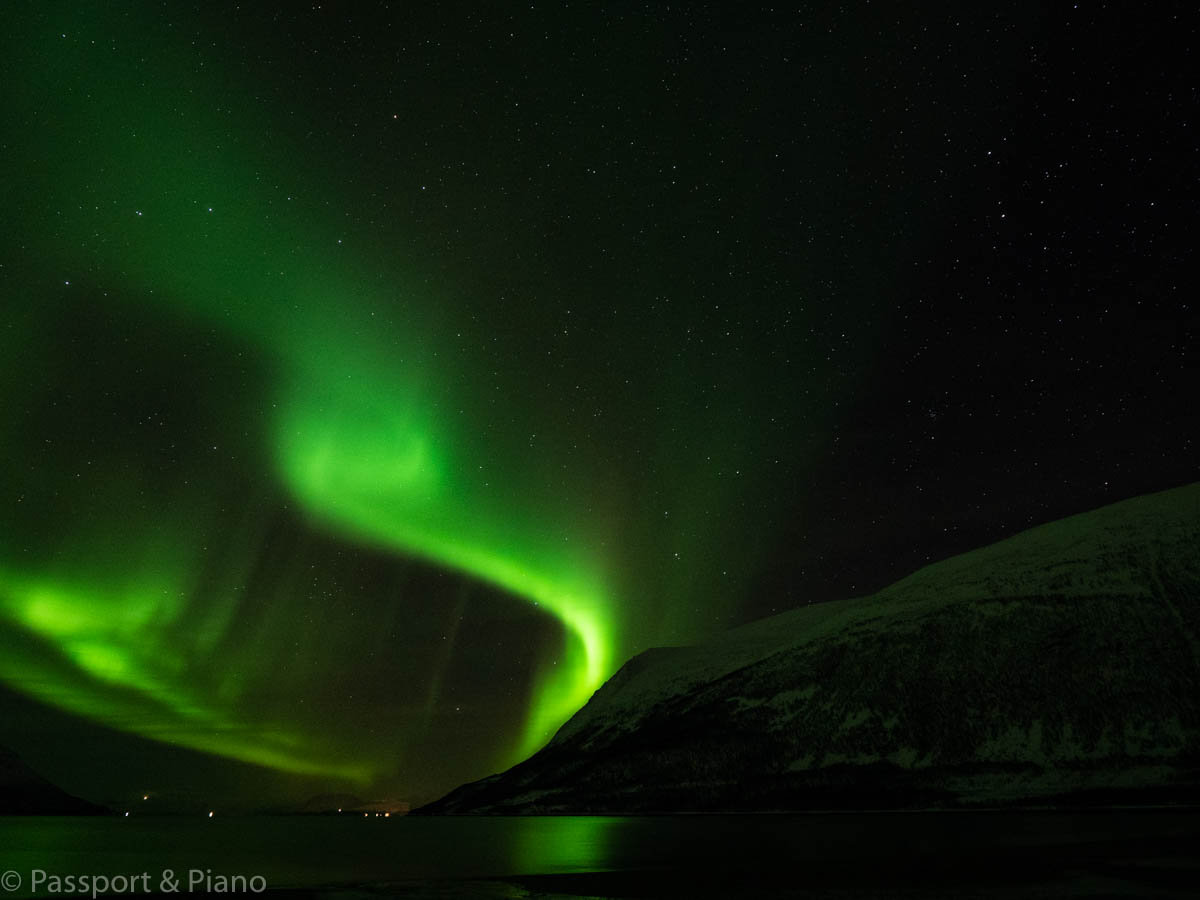
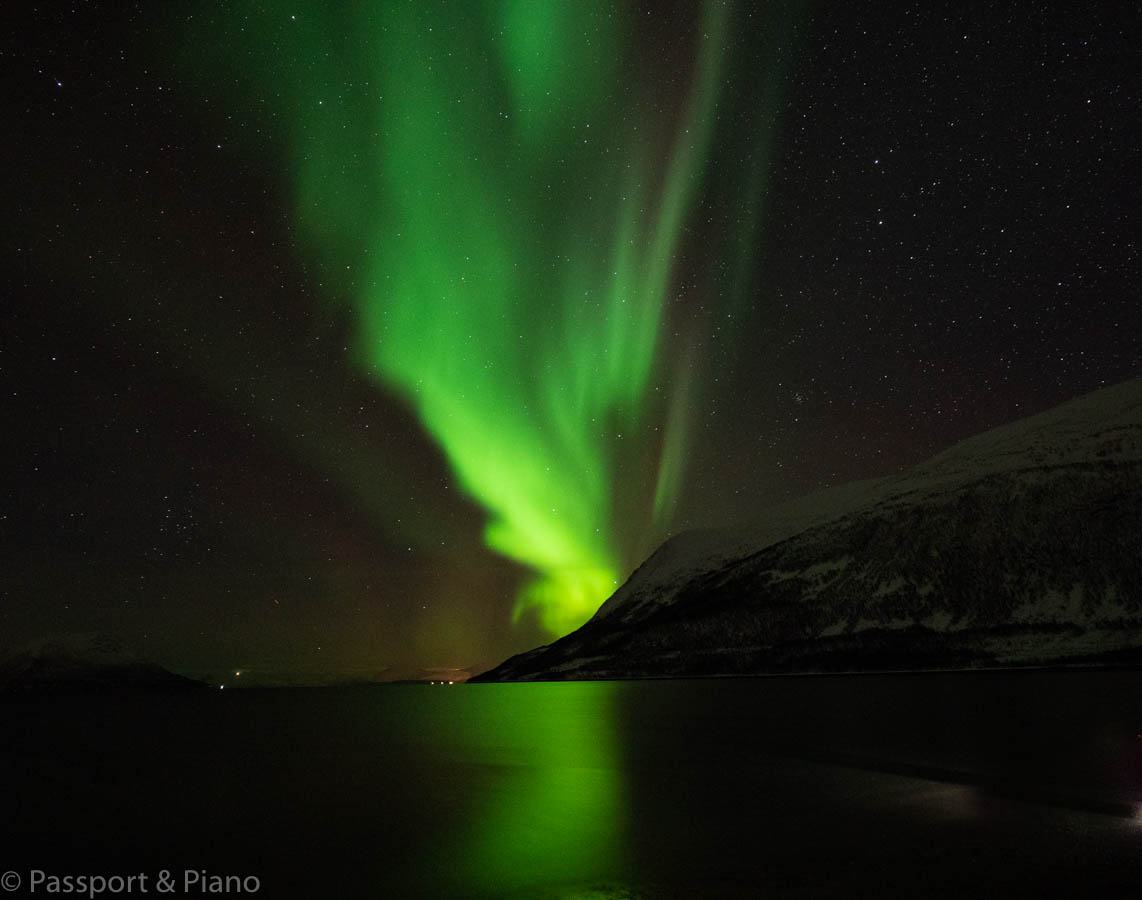
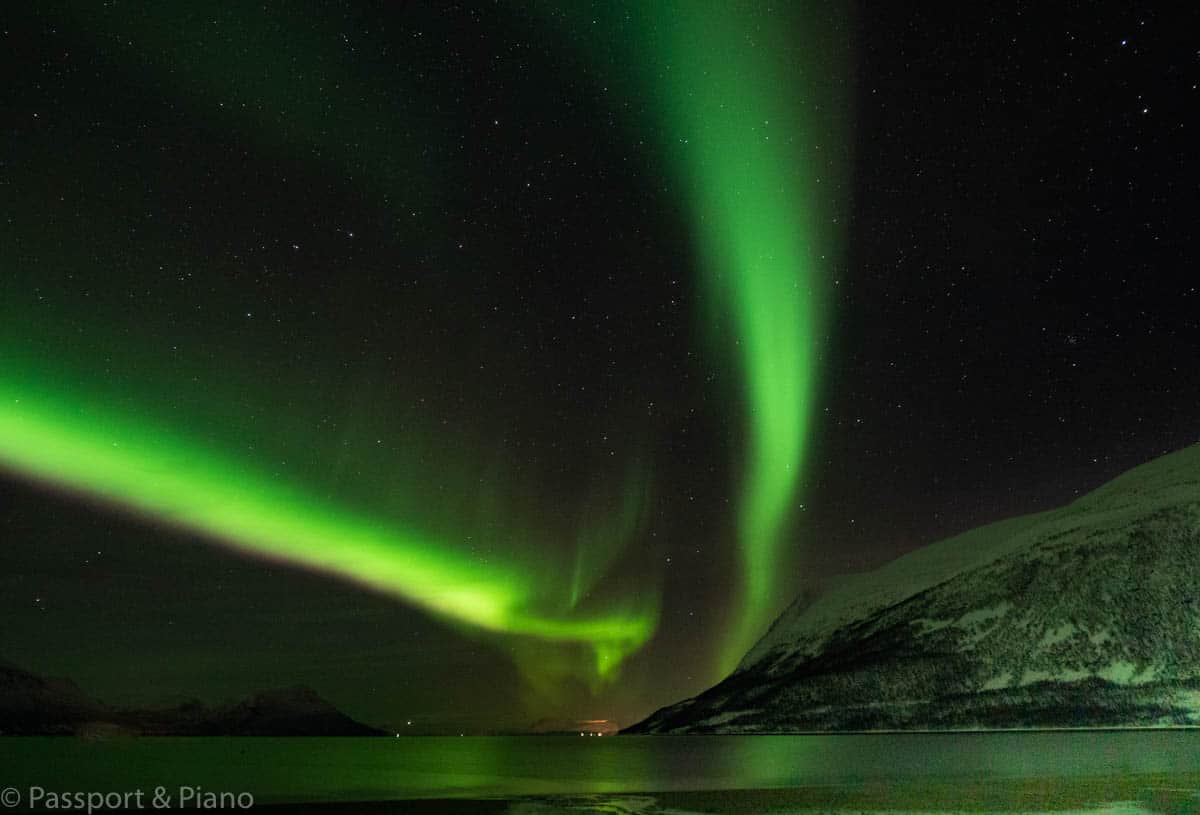
You may be able to see a brighter aurora without your camera as it will probably look more green. However, it will look much better in your images.
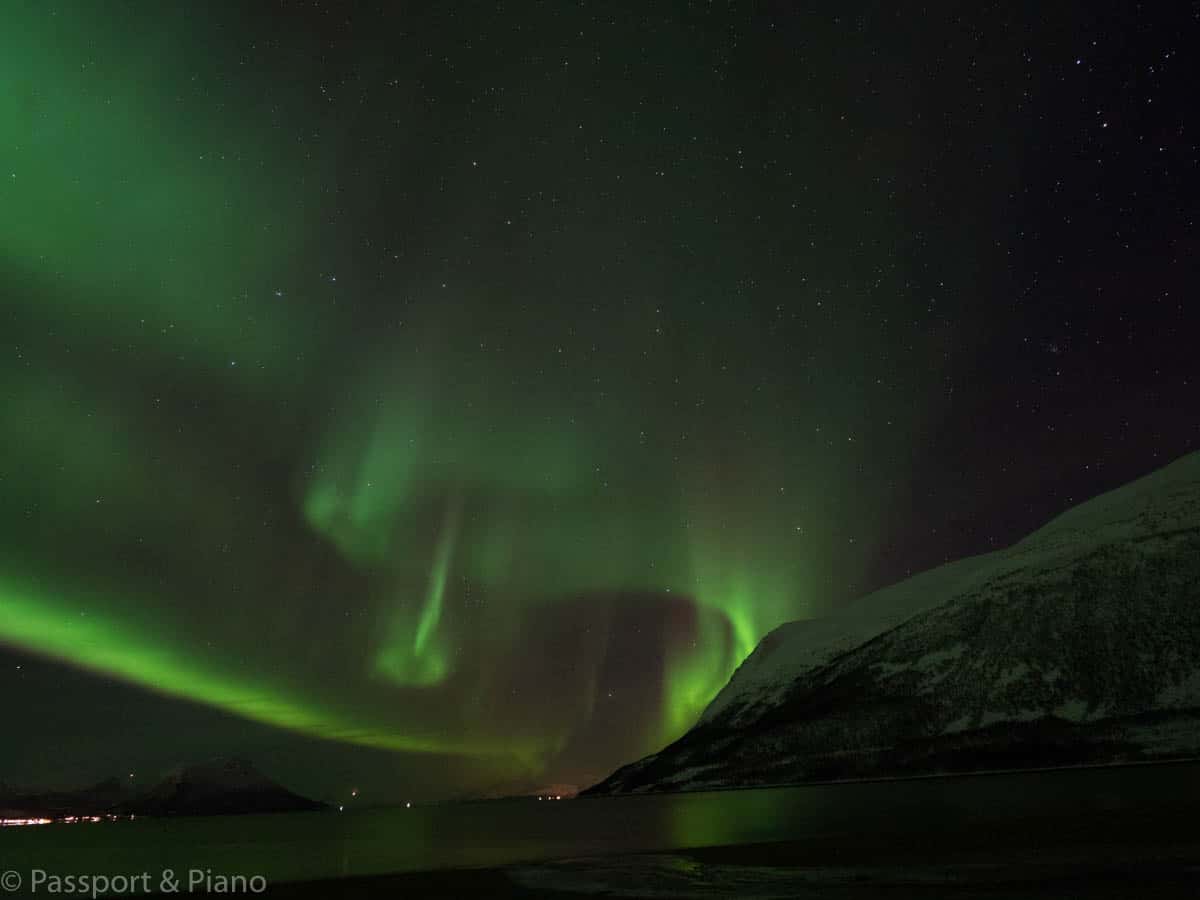
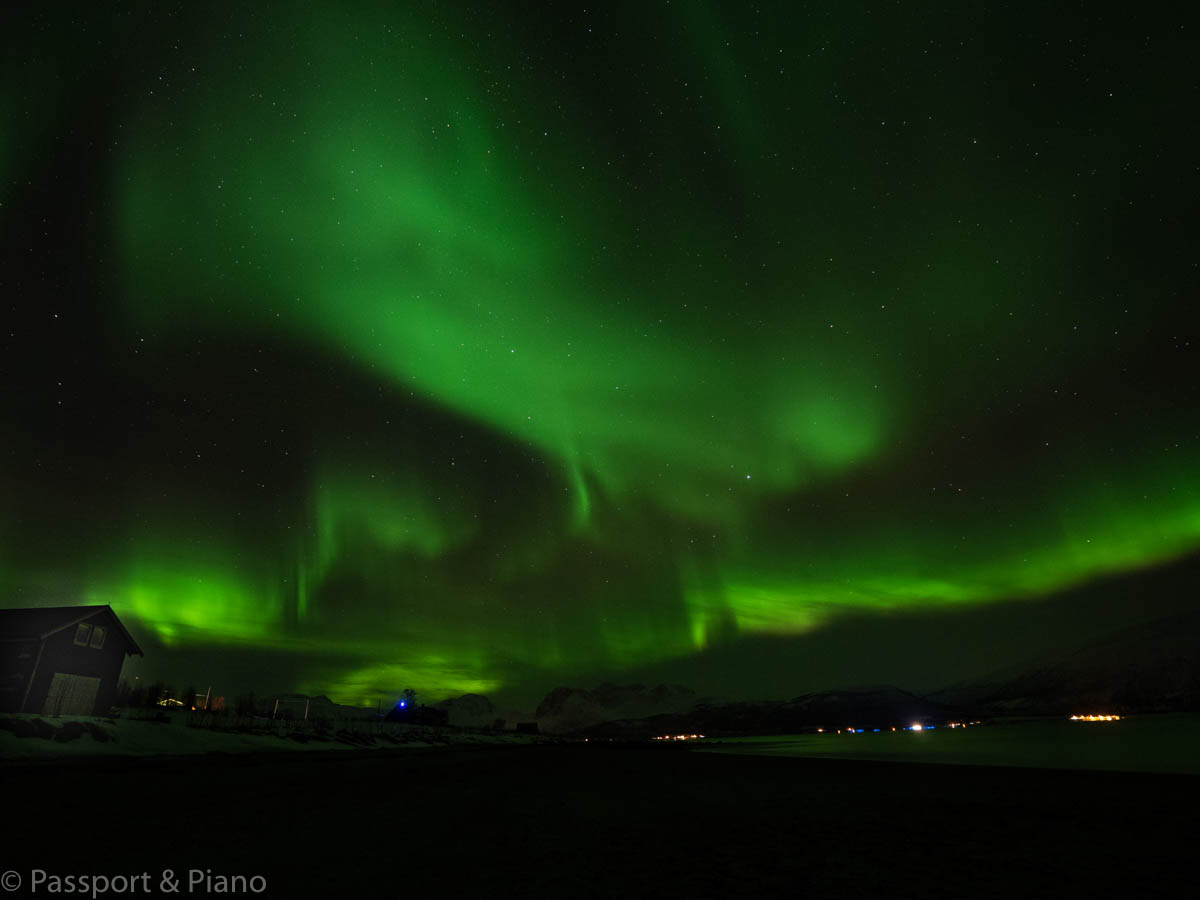
The aurora borealis appears in many shapes and forms. There can be one or two straight lines, it can form swirls and patterns, or the whole sky could be glowing green. It can also move across the sky which people describe as “dancing”.
The colour of light changes if the aurora borealis is closer to the earth surface.
You may get to see purple or even blue lights if the aurora gets close.
While green is the most common colour, the lights can also appear red if they are further away.
Have your camera already set up
The northern lights can appear when you least expect them to, and you don’t want to be having to quickly read through your guide on how to take photos of northern lights if this happens.
Attach you tripod plate
Tripods come with a plate that attaches to your camera and allows you to connect/release the camera to the tripod quickly.
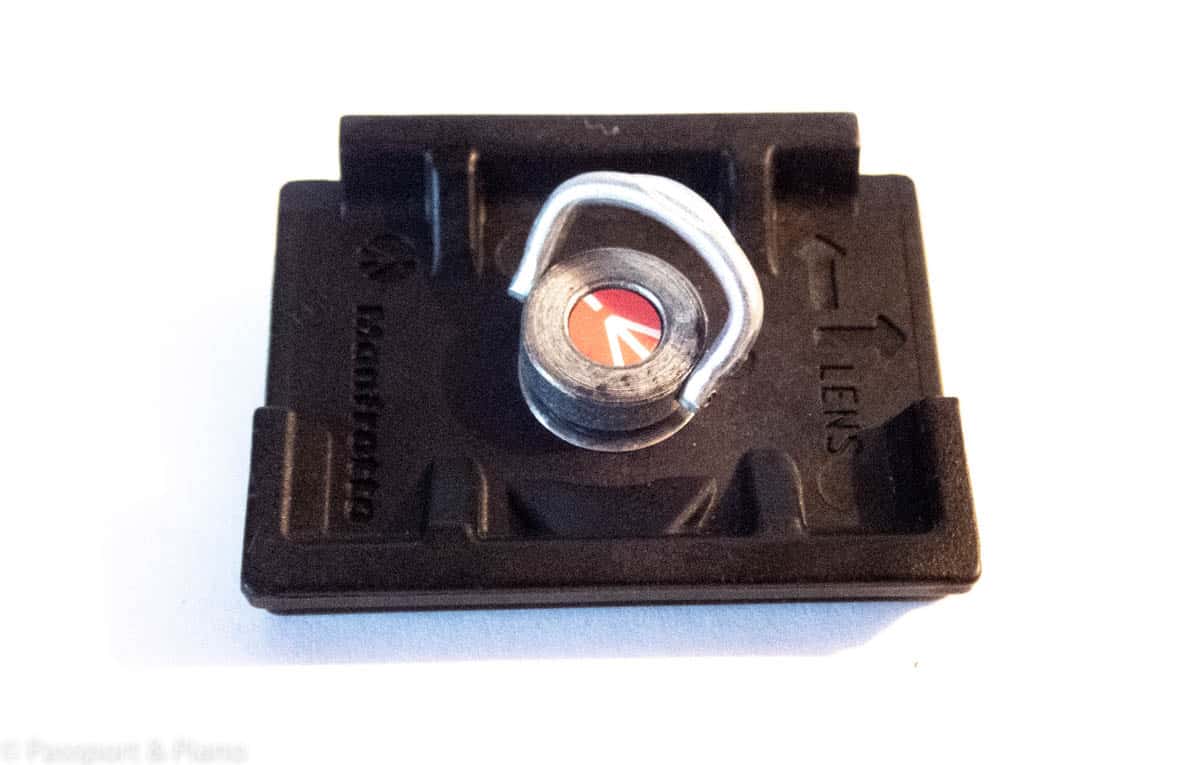
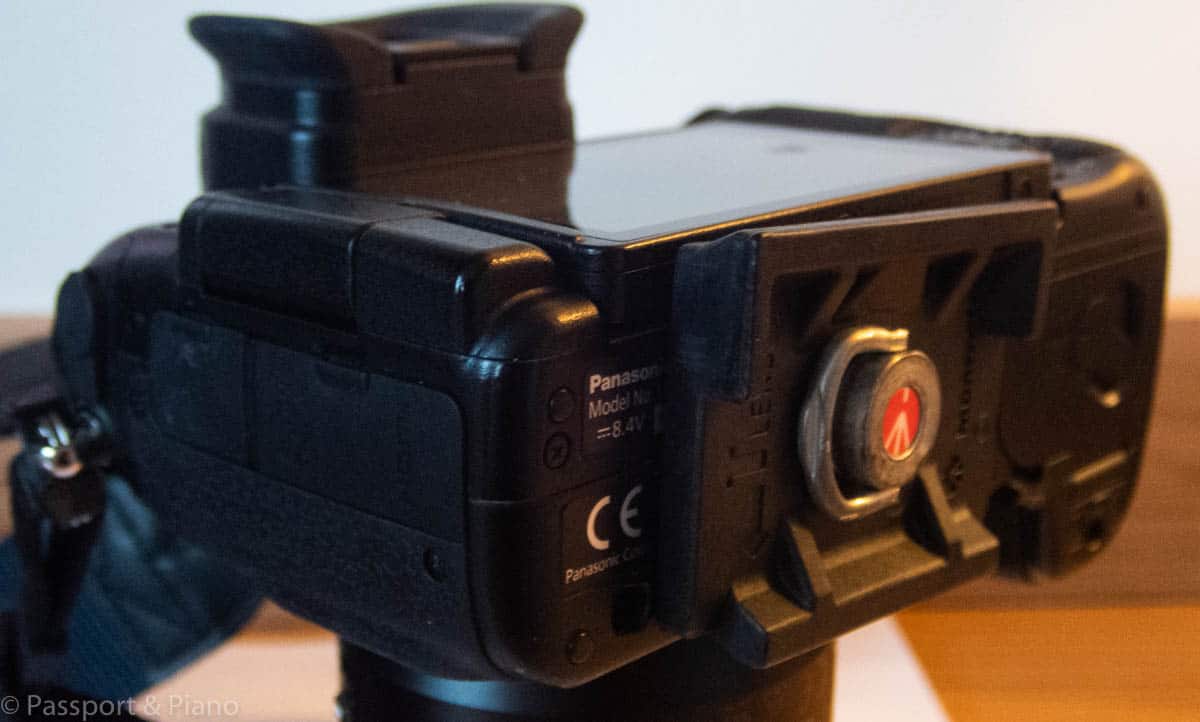
Tripod plate attached to a camera
It’s best to attach the plate in daylight to prevent fumbling around in the dark. I leave the plate attached to the camera permanently.
Northern Lights Photography Tips
Now you’ve got all the settings sorted on your camera, here are a few things to consider to ensure that you enjoy your photography experience.
Wear the right clothing
Temperatures in the aurora zone can often be below zero and spending hours outside capturing northern lights photographs means you need to wear the right clothing.
For maximum warmth, make sure you layer your clothing. Start with thermal underwear made from merino wool.
Then add at least one mid-layer on top with snow or ski pants for the bottoms.
As a top layer choose a thick Parker or ski jacket. You may also wish to wear a thermal suit if you’re going to be outside for lengthy periods.
Thermal Boots – Winter boots that are thermal lined are a must such as these [easyazon_link identifier=”B07BBMQLQP” locale=”US” tag=”passportand0e-20″ cart=”n”]Sorel boots for women[/easyazon_link] or these [easyazon_link identifier=”B00AZODBT8″ locale=”US” tag=”passportand0e-20″ cart=”n”]snow boot for men by Kamik[/easyazon_link].
Hats, gloves and neck warmers – You can lose much of your body heat through your head so don’t forget to wear a hat.
Your hands also need protection, so it’s advisable to wear both thin merino base layer gloves and thick thermal gloves as well.
Taking photographs may mean you have to remove your outer gloves frequently, so I like to use hand hotties inside my lining gloves for added warmth.
You can read more about what Norway clothing to wear in winter here and apply if necessary to your chosen destination.
Headtorch
Carry a [easyazon_link identifier=”B014JUMTXM” locale=”US” tag=”passportand0e-20″ cart=”n”]head torch[/easyazon_link] so that you can see in the dark and adjust your camera settings if necessary.
Carry several spare camera batteries
In cold conditions, your camera batteries will have a much shorter life span so make sure you’re prepared by carrying at least one spare.
Sd Cards
If you’re shooting in RAW format, SD cards can quickly get full so purchase ones that have plenty of space. It’s also advisable to back photos up to an external hard drive after your aurora photography trip.
Compass
Carry a compass so that you know which direction to stand to face north.
Take some practise shots
When learning how to photograph aurora borealis, it can seem complicated, so practice taking some night photography before you go on your trip. Get familiar with your camera and learn where all the settings are.
At a glance-how to photograph the aurora
Set the camera on a tripod
Put the camera in Manuel Mode
Set the focus to infinity
Make sure the aperture is on 2.8 or below
Set the ISO to 1600 to begin with
Start with a shutter speed of 15 or 20 seconds
Adjust the settings – if the northern lights are only appearing faintly in your photographs increase the iso and the shutter speed. The opposite, of course, apply if they are coming out too brightly.
Snacks
Don’t forget to take a hot drink and some snacks as you can be out for much of the night when out on a northern lights photography trip.
How to Photograph Aurora on your Smartphone
While the results will not be as good as using the best DSLR camera for northern lights, it is possible to use your smartphone camera to capture northern lights images.
You will need a tripod and one of the latest smartphones to get the best results. As with the camera set the aperture as low as it will go.
The latest smartphones have fantastic lenses that have f stops as low as 1.5. If this is the case start with an iso level of 400 and an exposure time of 15 seconds.
I hope this post has been useful and that you capture some amazing photos on your next aurora photography trip.
Passport and Piano is a participant in the Amazon Services LLC Associates Program, an affiliate advertising program designed to provide a means for sites to earn advertising fees by advertising and linking to amazon.com, amazon.co.uk, amazon.ca. Amazon and the Amazon logo are trademarks of Amazon.com, Inc. or its affiliates.

Hi, I’m Fiona Berry- I live in Lancashire in the North of England, but my job as an instrumental music examiner takes me all over the world. Travel has enriched my life in so many ways and allowed me to experience different cultures, make new friends and see extraordinary sights. Through this blog, I share my knowledge and expertise so that my readers have all the resources they require to ensure their travels provide unique and unforgettable memories to destinations that are beyond the ordinary.
Find me on: Web
